
This is the second part of Victor Ha's tutorial on creating time-lapse videos! If you missed part 1, be sure to check it out here. You can also view this entire tutorial on his blog, HDSLR Video Shooter.
Once you’ve taken the time to capture the files in your time-lapse sequence, there are a variety of different options available that will combine them into an actual movie. Today, we will cover two of the more widely used post-production techniques for creating time-lapse sequences. As you’ll soon be able to see, one technique is fairly simple, but limited in functionality, while the other technique provides countless options, but is a little more advanced. Both techniques will result in a time-lapse movie, but there are pluses and minuses to both. I encourage you to try both techniques and decide which one is best for you.
Warning: Timelapse movies can be very large files and often will not play back smoothly until they are down-sized in an editor Like Premiere Pro CS6. If your movie does not play back smoothly, it’s most likely because your computer just can’t keep up with the movie. To remedy this, export a lower-res version of your movie. If you want to be able to preview your movie before exporting, I recommend lowering the preview quality in Adobe Premiere Pro CS6 to 1/4th before clicking play.
METHOD 1: USING QUICKTIME 7 TO COMBINE AN IMAGE SEQUENCE
Using Quicktime 7 is perhaps the easiest way of creating a movie from images captured during a time-lapse sequence. The steps to this method are pretty simple, but your overall editing and exporting options are quite limited. However, if you’re looking for a quick way to crank out a time-lapse and don’t specifically want to do much post-production, it’s a great method and gets you a movie file fairly quickly.
Step 1: Open an image sequence in Quicktime 7. That option can be found under the "File" menu in Quicktime 7.

Step 2: Navigate to your images, select the first image, and then click "Open".

Step 3: Select your frame rate and click "Ok". I typically choose 23.976 frames per second for my time-lapses. Quick Time 7 will then create a sequence for you to preview and export. There is no status bar during this process, so just be patient and Quicktime will eventually load the preview when it’s done putting the sequence together.

Step 4: Once the preview is loaded, click "Export" under the "File" Menu.

Step 5: A dialog box will appear and ask you where it should save the file. Assign a filename and a save location to your time-lapse movie and then click "options".

Step 6: Click on "Settings" in the Movie Settings Dialog Box.
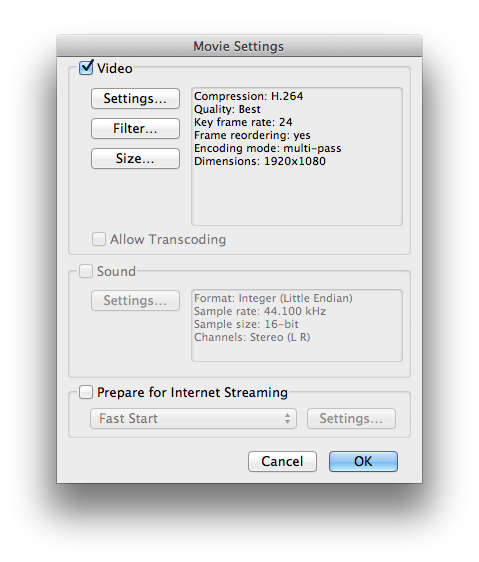
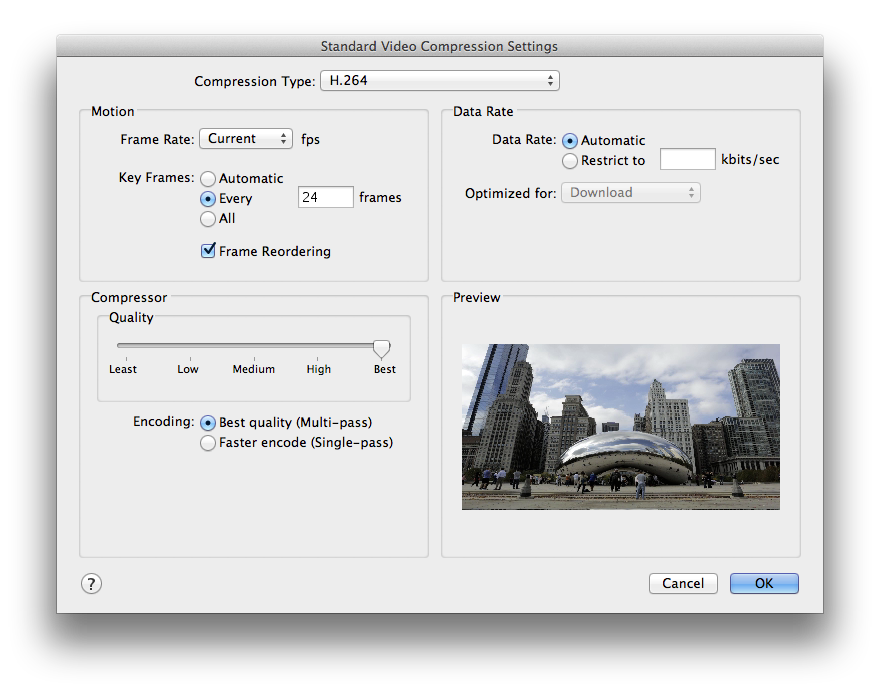
Step 7: Make sure your compression type is H.264 and that the compressor slider is moved to the "Best" position. Verify that you’ve made the changes and then click "Ok".
Step 8: You will be returned to the Movie Settings Dialog Box. From there, click "Size".

Step 9: Change the dimensions of your movie by selecting the "1920×1080 HD" option. Click OK.

Step 10: You will be returned to the Movie Settings Dialogue Box. From there, click "Ok" and wait for your time-lapse movie to export.
Step 11: Load your time-lapse movie file into an editing program like Premiere Pro CS6 to down size and export out to a smaller file.
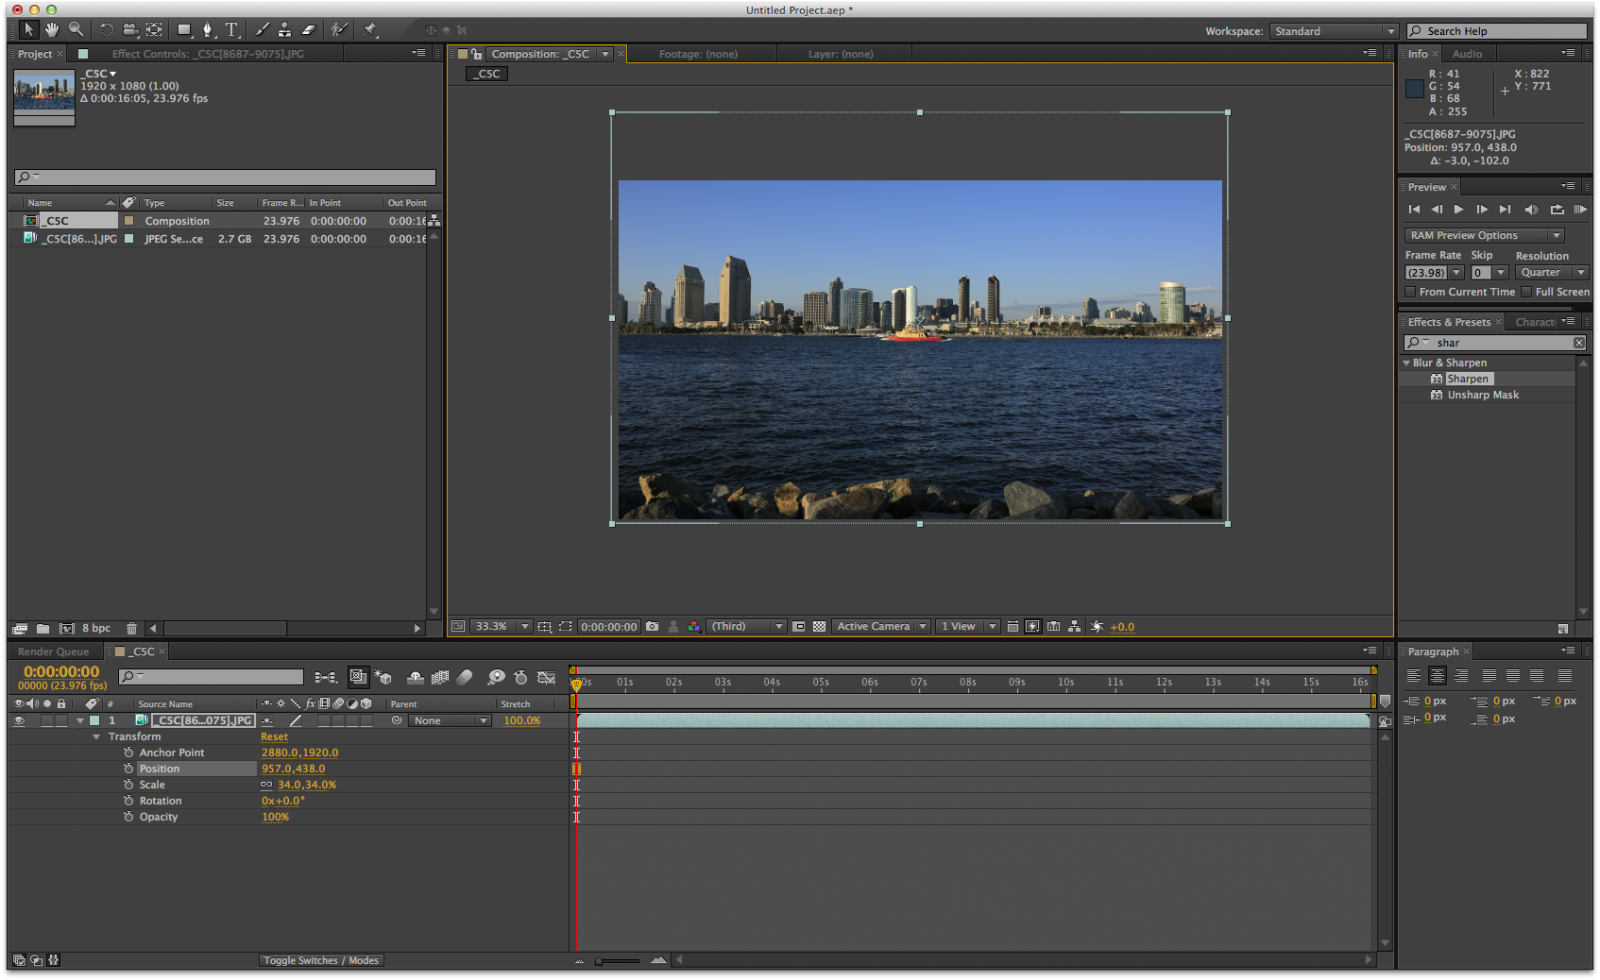
METHOD 2: USING ADOBE AFTER EFFECTS TO COMBINE AN IMAGE SEQUENCE
As you can see, using Quicktime 7 is pretty quick and easy, but there are some limitations to what you can do. For example, it’s impossible to crop or recompose your frames before exporting the final movie. This can be a problem if you want to scale, crop, or position your images before exporting. With Adobe After Effects CS6, not only can you change the sequence before exporting, you can also make a variety of other edits and adjustments to the sequence as well. It’s a night and day difference when compared to Quicktime 7, but the flexibility comes at the price of increased rendering time. A simple rendering and export of a movie can go from being a few minutes long to being hours long if multiple edits are made to the sequence. For many, the trade off between flexibility and time is well worth it because Adobe After Effects CS6 provides filmmakers with an ability to control everything about the movie from start to finish. This is a very powerful proposition, especially if the sequence is going to be inserted into a larger project.
The following is a basic guide on how to import and export time-lapse sequences using Adobe After Effects CS6. While Adobe After Effects has a lot of features that will allow you to adjust your time-lapse video before exporting, I wanted to keep this tutorial simple and easy to follow. Please stay tuned for future tutorials!
KEEP UP WITH VICTOR: HDSLR Video Shooter | Facebook | Twitter | Google+ | Instagram