
As simple as it sounds, those who approach their new lens to clean it for the first time may wonder, "Am I going to hurt it?" or "Am I cleaning this the right way?" There are probably several techniques to clean your lens properly, and I have seen some people go through a spiritual-type ritual to do it, which is fine if it comes out clean and undamaged. I've collected answers from many different people, so I have amassed them and am presenting them to you as a method that should work when you notice that your lens is getting a bit dirty.

First, prevention. Preventing your lens from getting dirty in the first place is always the best answer. I remember reading in the retrospective for Galen Rowell, that when he and his understudy took a long trek in Tibet, the second photographer noted that Galen Rowell was obsessive about keeping his equipment protected and clean. Sand, dust, water, and sea spray can all do damage that may not be first apparent. The rules of thumb for me include 1) If I'm not using it, I store it if possible 2) If I'm in the rain or in the sea spray, I'll often cover it with a Kata covering or even an extra jacket 3) I store it in a cool, dry place 4) I clean it as soon as possible if I know it is dirty 5) I keep some sort of filter on it when not shooting like a UV filter or circular polarizer.
So on to the cleaning.
1) Detach the lens and inspect it in a clean, dry environment. Cleaning your lens in a stiff breeze in the desert may not be a good idea. You can't see tiny particles of sand that are collecting inside the lens when you have it unmounted. Examine it in an environment where you won't damage it. I usually inspect the outer and inner portions of the lens to see what I am working with. If I don't see any film, fingerprints, dust on either of the elements (front element or rear element), I don't touch them. No reason to go jamming a cloth onto something when it's clean. There may still be a grain of sand that I will inadvertently drag across the element, which cannot be fixed. If it's not broke, don't fix it.

2) Wipe the outside. I usually put the UV filter back on, the rear lens cap back on, and then wipe down the outer portion of the lens with a slightly dampened cloth. That way when you start to go into the more delicate glass, you know you won't move any sand particles or dust into the inner portion of the lens. This doesn't need to be a lint-free cloth, but go easy on the outside of the lens as well. It's still delicate.
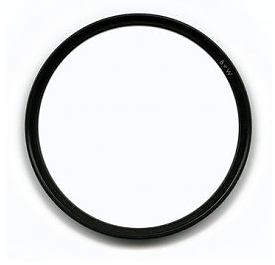
3) Rocketblast the UV filter. The first order of business is to remove the dust and loose particles with air. No sense in dragging them across a glass surface when you can spray them off gently with air. The Rocket Air Blaster by Giotto has been wildly famous for this and is only about $12. It delivers enough power though to dislodge some loose dust. That's the idea. Get rid of everything you can before wiping the glass. By the way, I usually keep the rear cap on while I'm doing this.
4) Lens Pen the UV filter. The next step is to step it up with the brush on the Lens Pen. It's still soft, but provides a physical sweeping of the glass that will dislodge dirt and dust but is not as harsh as actually wiping the glass. I work in a circular motion around the edges, and then in the middle of the UV filter.

5) Lint-free cloth and Photo-Clear Lens Treatment. With the easily removed dust gone, I am ready to spray a clean lint-free cloth with Photo-Clear Lens Treatment and gently wipe in circular movements around the outside of the lens, moving in toward the center. I then unscrew the UV filter and inspect the backside of the filter and the actual lens element. Normally, I keep the UV filter (or circular polarizing filter) on at all times, except that last minute when I want to shoot something without either one. In my case, I rarely need to clean the front lens element at all, since it is taken care of so well by a UV filter. If I do, then I very carefully perform the same steps in the same order.
6) Cap the front lens element and decap the rear lens element. Now we turn our attention to the rear lens element, and again, I rarely need to clean this much as it is always protected by the cap or the body of the camera. If I do see something on it, I use the Rocket blaster to try to dislodge it. This usually works. If not, I proceed through the same steps as before.
Bottomline: Prevention is the key to keeping equipment clean and dry. If you need to clean the lens, do it methodically by going from least invasive to more invasive (air, brush, lint-free wipe with solution). Be gentle. Like plaque on your teeth, things usually come off pretty easily. It's when you brush too hard that your gums recede (or your lens gets scratched). If you would like a personal demonstration, stop in at Pictureline and have the friendly staff demonstrate their favorite process of cleaning a lens.
RELATED ARTICLES
Focus on Photographers - Trevor Clark
Roadside Photographs - Antelope Canyon, Arizona
Focus on Photographers - Tom Till