
Sometimes a 3-inch LCD screen just doesn’t cut it. While it’s great to see the overall shot, you miss some major details—details that can often make or break a shot—on a screen that size. Wouldn’t it be nice to see your images on a big screen in real-time?
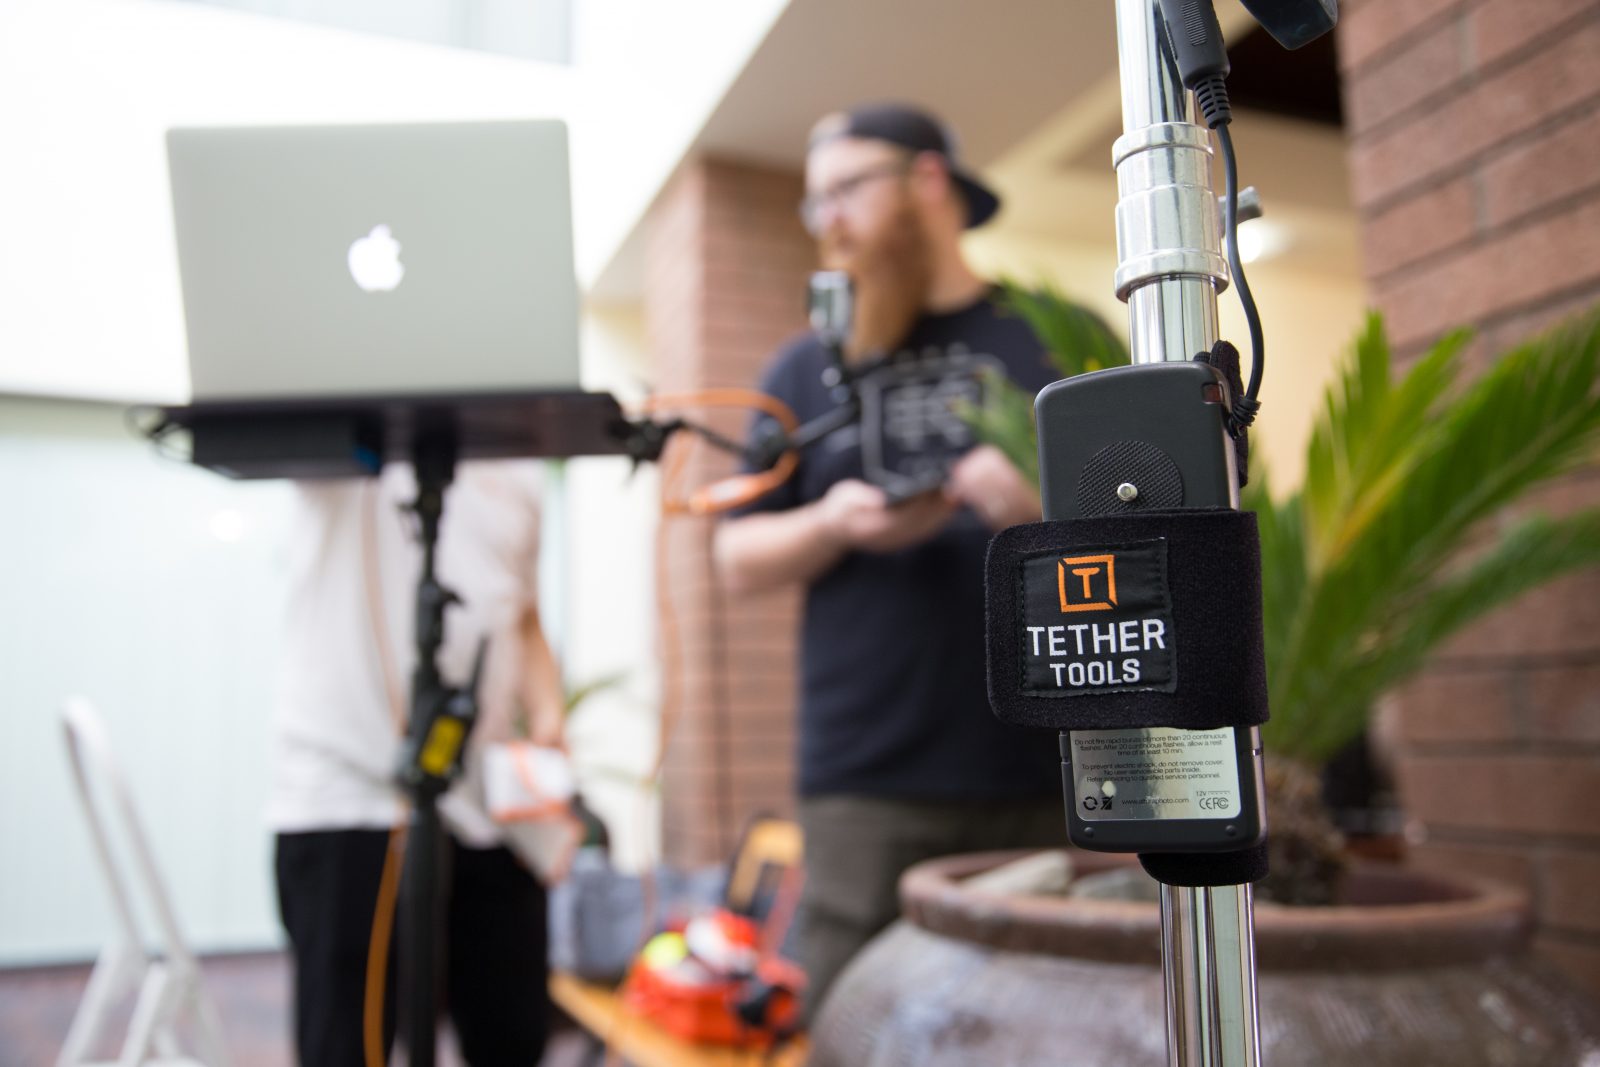
We’re talking about tethering. Tethered shooting is when you connect your camera to a computer or tablet via a cable or wirelessly. This allows the image to bypass the camera and save directly to your computer. It also allows you to see the RAW photos on a big screen, which means you, your assistant, creative director, client, or anyone else can see the photos accurately right then and there. This results not only in better photos but an improved workflow.
But tethering is expensive, right? The answer is that it can be; however, in recent years tethering has become more affordable and more accessible for photographers of all different levels and specialties. In fact, Pictureline has recently added some quality tethering products to our inventory. Tether Tools is a "design and manufacturing company that provides custom photography equipment and accessories for shooting tethered." You can find Tether Tools products on our site by clicking here. But before you begin browsing, check out these five steps from the Tether Tools blog, TetherTalk.
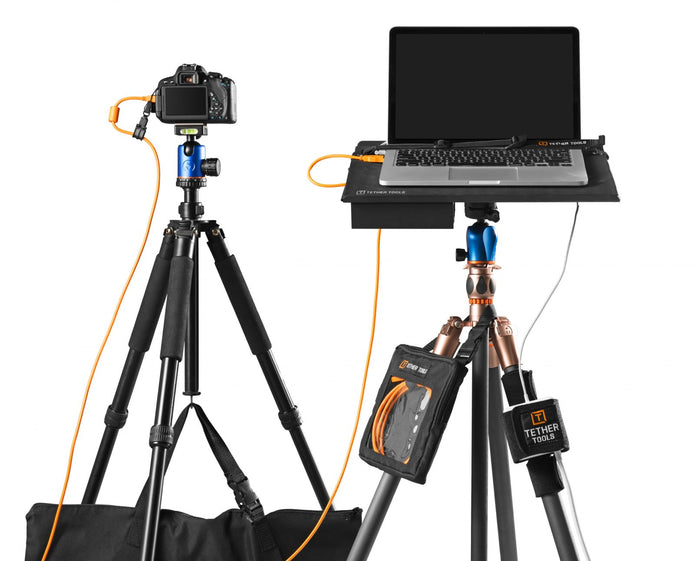
Step 1: Use a Computer or Tablet with a Large Monitor
In order to start shooting tethered, you need to decide where to send your images – laptop/computer, iPad/Tablet, direct to a monitor. The most common tether connection is from a camera to a computer. You’ll want to ensure your computer has a port for connecting a tether cable. Most tethering takes place through a USB cable, so if you have a USB port, you’re equipped to connect your tethering cable. Whether it is a laptop or desktop, PC or Mac—they all will need a minimum of 2GB of RAM to tether. The more RAM and better processor, the faster the tether within your software.
Step 2: Make Sure Your Camera is Capable of Tethering
Most DSLR cameras have an output port (USB, FireWire, HDMI, etc.) that enables image transfer, but not all are optimized for tethering. Be sure you confirm your camera’s tethering options by reviewing your manual. Depending on what tethering software you are interested in, ensure your camera is supported by your tethering software.
Step 3: Choose Your Tethering Software
In order for the images to be received by your computer, you’ll need a software that supports tethered capture. There are many software options available—including the utility software that comes with many cameras. There are quite a few options ranging from free to about $300—and all with varying levels of functionality. TetherTalk offers a quick rundown on tethering software options here.
Step 4: Use a Tethering Cable or Wireless Transmitter
You have the option to either tether by cable or tether wirelessly. This is your preference and often depends on your subject, location, capture and processing needs. Cabled tethering is the fastest, most secure and reliable option and enables RAW image transfer, camera control, RAID back up and efficient processing—among other benefits. Wireless tethering offers instant transfer to iPads and tablets in addition to computers and gives photographers fluid mobility, image sharing, zoom and camera control among other benefits—depending on the wireless transmitter of choice.
Cable Option
If you prefer traditional tethering, you’ll need to confirm which cable is right for your camera and computer. Tether Tools offers cable options for most DSLR and Medium Format cameras in 15-foot lengths, which is usually sufficient for most tethered photo sessions. Be sure to check the Camera Compatibility Guide for TetherPro Cables to confirm which cable is right for your gear. And if distances of longer than 15 feet are needed, TetherPro Active Extension cables are ideal for daisy chaining up to 80 feet of cabling distance.
Wireless Option
If you decide you would like to tether to your Mac, PC, iPad/iPhone or Android, CamRanger is a great option to consider. The CamRanger is a wireless transmitter that sends the photos you take directly to your iOS, Mac, PC or Droid. The device can be mounted to the top of your camera, or on a camera strap for easy transport. Wireless cards such as Eye.fi are also nice options depending on your needs, wireless network access and distance from your device. These options are more accessible than cameras with built-in WiFi and they are camera agnostic so they’ll work (with limitations) with multiple cameras.
Step 5: Set Up Your Tethering Workspace
Whether you are setting up for an on-location shoot or designing a studio workspace, the same rules still apply. It is important to know what you need for your workspace to function efficiently during your tethered photography shoot. There is nothing worse than tripping over cables, misplacing backup hard drives, and gear that is not secured and could get damaged during the inevitable flow of your shoot.

Depending on your requirements for a tethered workstation, there are many things to consider: How will I conveniently position the laptop or computer I use for tethering? Where do I put my backup devices and external hard drives? Will there be room for my mouse, trackpad or Wacom tablet? How will I keep my cables safe and ensure my gear is safe while shooting?
Tether Tools offers Tether Tables and you can even customize your own Tether Table. Be sure to secure items like laptops to your Tether Table with a SecureStrap that attaches to each side of the table and can be tightened to the size of your laptop.
If you're looking for a more hands-on approach, come to our Tethered Tools Event on May 18th. Here's a list of what you'll learn:
- How to prepare for studio-quality location shooting
- Powering up on location
- Setting up a location workflow
- What hardware and tethering solutions are appropriate for your needs
- How to set up a client viewing station
- Speeding up post production