
In the last Workflow Friday blog post we covered the Profile and Color sections of the Lens Corrections panel in Lightroom’s Develop module. Here, in this second Lens Corrections blog post, we will discuss the Basic and Manual sections of the Lens Corrections panel. Let’s start out with the Basic section.
LENS CORRECTIONS PANEL - THE BASIC PANEL

Here is a screenshot of the Develop module with the Basic section of the Lens Correction panel open.
When you open the Lens Correction panel you will see a section named "Basic," as in Photo 2 below. The Basic window is home base now for the Lens Corrections panel. Instead of having to go into the individual sections of the Lens Correction panel you can now just select the check boxes next to the features you wish to turn on. You can select the check box next to "Enable Profile Corrections" to turn on the camera profile, which removes lens distortion and vignetting. Additionally, you can select the check box next to "Remove Chromatic Aberration" to remove any chromatic aberrations in the image. If you wish to go in and fine-tune these adjustments then you will have to select those panels and go into them individually.

The Basic section of the Lens Correction panel.
AUTOMATIC UPRIGHT PERSPECTIVE CORRECTION
The Basic panel also contains the Upright Perspective Correction tool, as shown in Photo 3. Depending on the button you click here this tool will automatically level the image, make vertical lines perfectly vertical or straighten the perspective. Choosing "Auto" will automatically level the image and also try to make the vertical lines perpendicular with the bottom of the image. Here are Adobe’s explanations for the four perspective control options:
- Auto: Balanced level, aspect ratio, and perspective corrections.
- Level: Perspective corrections are weighted toward horizontal details.
- Vertical: Perspective corrections are weighted toward vertical details and level corrections.
- Full: Combination of full Level, Vertical, and Auto perspective corrections.
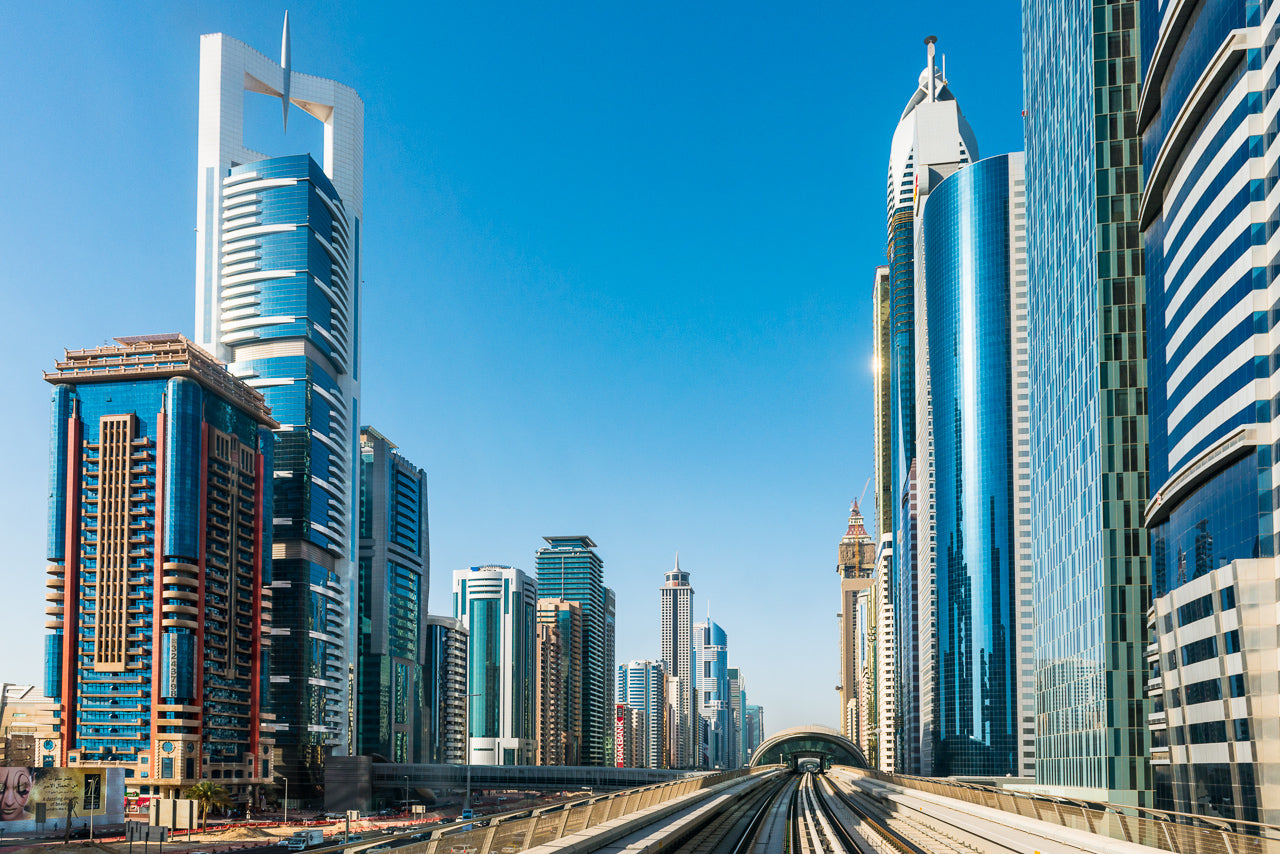
In Figures photo 1 and photo 3 you can see a before and after example of the Upright Perspective Control tool in action. In photo 1, the skyscrapers are obviously leaning inwards towards the middle of the image because I shot the image with the camera pointed upwards. By choosing the Auto option in the Basic panel, the Upright tool has leveled the horizon and straightened up the vertical lines so that they are parallel to the sides of the image as in photo 3 below.

Here, I have chosen Auto and the skyscrapers were automatically straightened and made parallel with the bottom of the image. Note that the image has also been cropped.
This tool obviously works well with architectural type images, which is why I chose this image to demonstrate the Upright tool. As you can see in photo 3, some of the image was cropped. Hence, if you intend to use this tool for architecture (or any subject matter) be sure to compose your image with a lot of room around the edges of the frame.
Just how well the Automatic Upright Perspective Correction tool will work on your images depends on many factors, which Adobe doesn’t explain. Hence, you will just have to try it out on a variety of images to see how well it works. I have found that for images with a distinct horizon line this tool levels the image quite well. For images with no distinct horizon it sometimes works well and other times not. In the later case, I use the Angle slider built into the Crop Tool in the Localized Adjustment Tools HUD to level the image.
LENS CORRECTIONS PANEL - MANUAL
The Manual section of the Lens Correction panel has sliders that allow us to deal with transforming the image (i.e. Distortion, scale, and alignment) and Lens Vignetting. These two options are shown in photo 4 and we’ll dive into them individually. As a side note, for almost all of my images, selecting the standard Lens Correction profile in the Profile section and the "Remove Chromatic Aberration" check box in the Color section takes care of most lens correction issues. In my experience, the Lens Correction Profiles do a great job of removing vignetting and distortion. In fact it does that job too well, and as I have already said, I tend to pull the Distortion slider back towards zero or turn it off all together. The one place where I find myself diving into the manual controls most often is to adjust the Vertical or Horizontal planes of an image.

Here is Manual section of the Lens Corrections panel.
The Transform section allows one to manually adjust the distortion of the image using the Distortion, Vertical, Horizontal, Rotate and Scale sliders. If you play with these sliders for even just a few seconds it becomes obvious what they do. By selecting the check box next to "Constrain Crop" you can also make sure that Lightroom is making the best crop possible of your image. I won’t dive into all of the options here since this section is very intuitive.
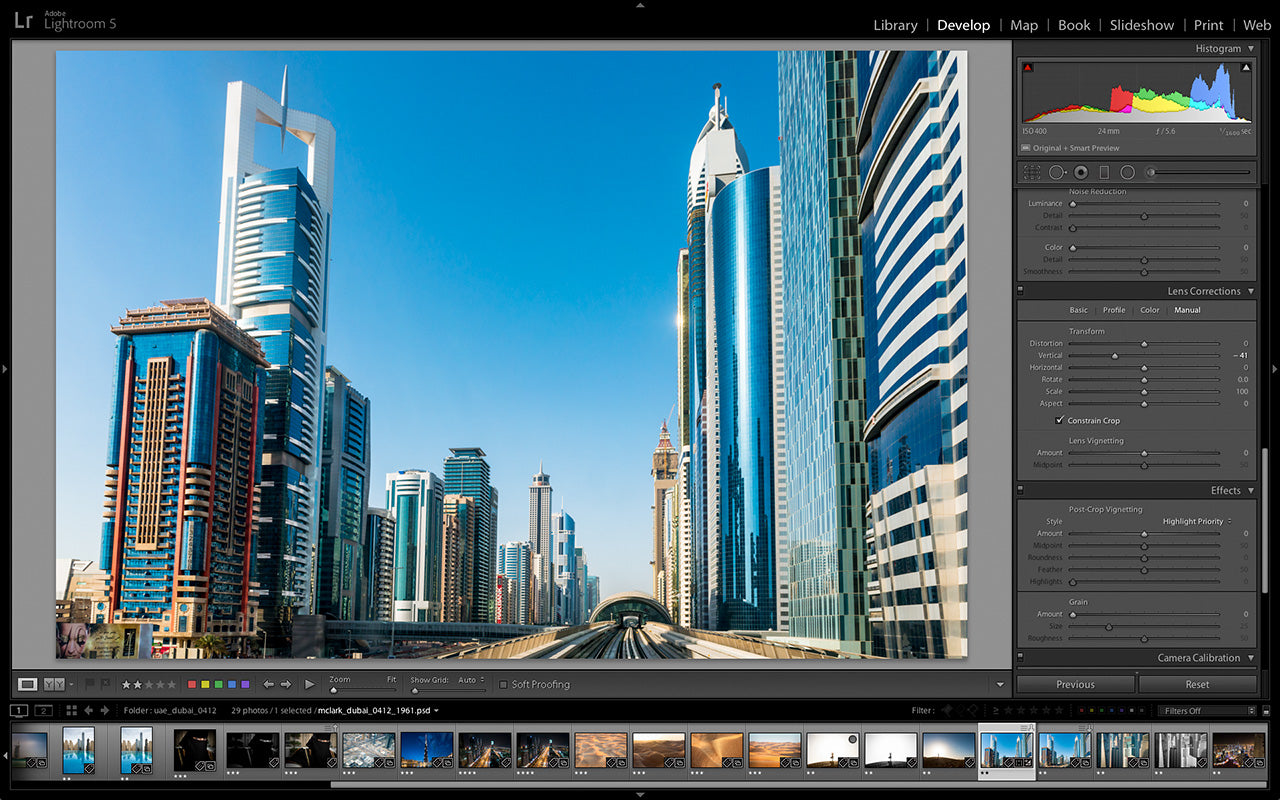
Here I have used the Manual sliders to straighten the same image. In this case, I pulled the vertical slider to -41.
Using the Lens Vignetting section you can either add or remove vignetting and using the Midpoint slider you can adjust how far into the center of the image the Amount slider removes or adds that vignetting effect. Playing around with these sliders for just a few seconds will be enough to see how this feature works.
I tend to skip the Lens Vignetting sliders in the Manual section of the Lens Correction panel as the Post-Crop Vignetting sliders in the panel just below the have more options and result in less posterization (a.k.a. stair-stepping), which results in better overall image quality.

Here is the finished image.
That is it for the Lens Corrections panel. In general, I make at least minimal adjustments to every image I work on in the Lens Corrections panel.

This blog post is a modified excerpt from my e-book, Adobe Photoshop Lightroom: A Professional Photographer’s Workflow. For more information on this e-book or to purchase the e-book please visit my website.
KEEP UP WITH MICHAEL:
Website | Blog | Workshops | Facebook | Twitter | Instagram |
Google+ | Behance